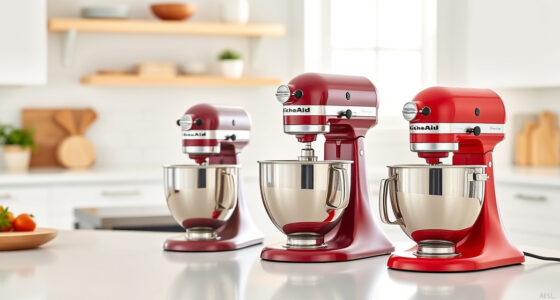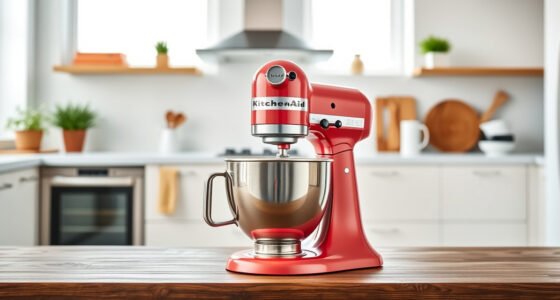

If your KitchenAid Artisan Series 5 Quart Tilt Head Stand Mixer is making a grinding noise, it can be a sign of a mechanical issue that needs attention. A persistent grinding sound may indicate worn gears, misalignment, or debris inside the mixer. Addressing the problem promptly can prevent further damage and restore your mixer’s smooth operation.

Get kitchen staples and gadgets delivered free with Prime
- Fast, free delivery on millions of items
- Prime Video, Amazon Music and more included
- Member-only deals all year
In this guide, we’ll walk you through practical, step-by-step troubleshooting methods to identify and fix the grinding noise safely. Whether you’re a seasoned DIYer or a casual user, these instructions will help you get your mixer back to optimal performance without risking damage or voiding warranties.
Key Takeaways
| Identify the noise source | Locate where the grinding noise originates inside the mixer. |
| Check for debris or obstructions | Remove any stuck particles or build-up that could cause grinding. |
| Inspect gears and components | Examine gear assembly for wear or damage. |
| Lubricate moving parts | Apply appropriate lubricant to minimize friction. |
| Replace damaged parts | Order and install new gears or components if needed. |
Step 1: Unplug and Prepare Your Mixer
- Ensure your mixer is unplugged from the power outlet for safety.
- Remove the attachment, bowl, and any accessories.
- Place a towel or cloth underneath to catch any small parts or debris that may fall during disassembly.
Step 2: Remove the Mixer Head and Access the Gears
- Loosen the tilt-head locking lever and gently lift the head to its upright position.
- Use a screwdriver to remove the screws holding the outer casing if necessary (refer to your model’s manual).
- Carefully lift off the outer cover to expose the internal gear assembly.
Step 3: Inspect and Clean the Internal Components
- Check for any visible debris, food particles, or buildup that could cause grinding.
- Look for signs of worn or damaged gears, such as chipped teeth or excessive wear.
- Use a soft brush or compressed air to clean dust and debris from the gear area.
Step 4: Lubricate Moving Parts and Replace Damaged Gears
- If the gears appear intact but dry, apply a small amount of food-grade lubricant suitable for metal gears.
- If you find damaged or chipped gears, order replacement parts from authorized suppliers.
- Follow the manufacturer’s instructions for installing new gears, ensuring they are properly seated.
Step 5: Reassemble and Test Your Mixer
- Reattach the outer casing securely, ensuring all screws are tightened.
- Lower the mixer head back into the tilt position and lock it in place.
- Plug in the mixer, and run a test with no load to check for any grinding sounds.
The Products in This Guide

KitchenAid Artisan Series 5 Quart Tilt Head Stand Mixer
- ✔ Voltage: 120V
- ✔ Warranty: 1-year limited
- ✔ Color Options: Multiple

KitchenAid Stand Mixer Attachment
- ✔ Weight: 3 pounds
- ✔ Warranty: N/A
- ✔ Color: Silver
KitchenAid Artisan Series 5 Quart Tilt Head Stand Mixer
<p>The KitchenAid Artisan Series 5 Quart Tilt Head Stand Mixer is built with durable metal construction and offers 10 speeds for versatile mixing tasks. Its tilt-head design allows easy access, making maintenance and cleaning straightforward. While it’s generally reliable, occasional grinding noises can occur due to gear wear or debris, which can be fixed with proper troubleshooting.</p>
Pros:
- Sturdy metal construction
- Easy tilt-head access
- Multiple speed settings
- Large 5-quart bowl
Cons:
- Gears may wear over time
- Can be noisy if debris accumulates
- Requires periodic maintenance
Best for: Home bakers and cooks needing a durable, versatile mixer
Not ideal for: Heavy users with frequent gear issues or those who prefer quieter operation
Bottom line: A durable, versatile mixer that can be maintained with some DIY troubleshooting.
KitchenAid Stand Mixer Attachment
<p>The KitchenAid Metal Food Grinder attachment is an excellent addition for those who want to process fresh ingredients and avoid issues like grinding noise. It connects seamlessly to your stand mixer and includes multiple grinding plates and sausage stuffer tubes for versatile use.</p>
Pros:
- Enhances mixer functionality
- Multiple grinding plates
- Sturdy metal construction
- Easy to clean
Cons:
- Additional cost
- Requires storage space
- Needs pre-chilling for best results
Best for: Home cooks wanting fresh ground ingredients
Not ideal for: If you rarely grind foods or prefer pre-ground options
Bottom line: A powerful attachment that enhances your mixer’s versatility for fresh grinding.
Frequently Asked Questions
Why is my KitchenAid mixer making a grinding noise?
A grinding noise can be caused by worn gears, debris in the gear assembly, or lack of lubrication. Inspecting and cleaning the gears often resolves the issue.
Can I fix the grinding noise myself?
Yes, with basic tools and careful disassembly, you can inspect, clean, and replace worn parts. However, always follow safety precautions and manufacturer instructions.
What tools do I need to fix my mixer?
Typically, you’ll need a screwdriver, possibly a wrench, and food-grade lubricant. Refer to your model’s manual for specific tools required.
Is it safe to disassemble my KitchenAid mixer?
Disassembling is safe if you unplug the unit first and follow proper procedures. If unsure, consult a professional or contact KitchenAid support.
How often should I lubricate the gears?
Lubricate the gears if you notice increased noise or resistance during operation. Regular maintenance can prolong the life of your mixer.
Keep Your KitchenAid Running Smoothly
Addressing a grinding noise in your KitchenAid stand mixer is often straightforward with a bit of inspection and maintenance. Regular cleaning, lubrication, and timely replacement of worn parts can extend the life of your beloved appliance. Remember to always prioritize safety when disassembling your mixer, and consult professional help if unsure. With these steps, you can enjoy quiet, efficient mixing for years to come.
Affiliate disclosure: As an Amazon Associate we earn from qualifying purchases. Prices and availability are accurate as of the time of publishing.
NFL season / tailgating Picks
team gear
As an affiliate, we earn on qualifying purchases.