Food Service Tips
How Do Restaurants Keep Salads Crisp?
Not only do restaurants prioritize fresh ingredients for crisp salads, but their secret techniques might surprise you—discover how they achieve that perfect crunch!
Restaurants keep salads crisp by focusing on fresh ingredients and smart handling techniques. They rinse greens under cold water and use a salad spinner to remove excess moisture. Proper storage is key; they place greens in perforated bins to allow airflow and keep them in the fridge's crisper drawer for ideal humidity. When assembling salads, they layer sturdier greens at the bottom and mix gently to avoid bruising. If greens get limp, a quick soak in ice water can help restore their crunch. There's more to discover about these techniques to guarantee every salad stays invigorating and satisfying.
Key Takeaways
- Fresh, high-quality ingredients are essential for vibrant salads and enhance overall flavor and dining experience.
- Proper washing and drying techniques, such as using a salad spinner, prevent excess moisture to keep greens crisp.
- Storing greens in perforated bins and using paper towels to absorb moisture improves air circulation and prolongs freshness.
- Layering sturdy greens first and gently mixing ingredients prevents bruising and maintains crispness during assembly.
- Soaking limp greens in ice water can revive their texture, making them crisp and fresh again.
Importance of Fresh Ingredients
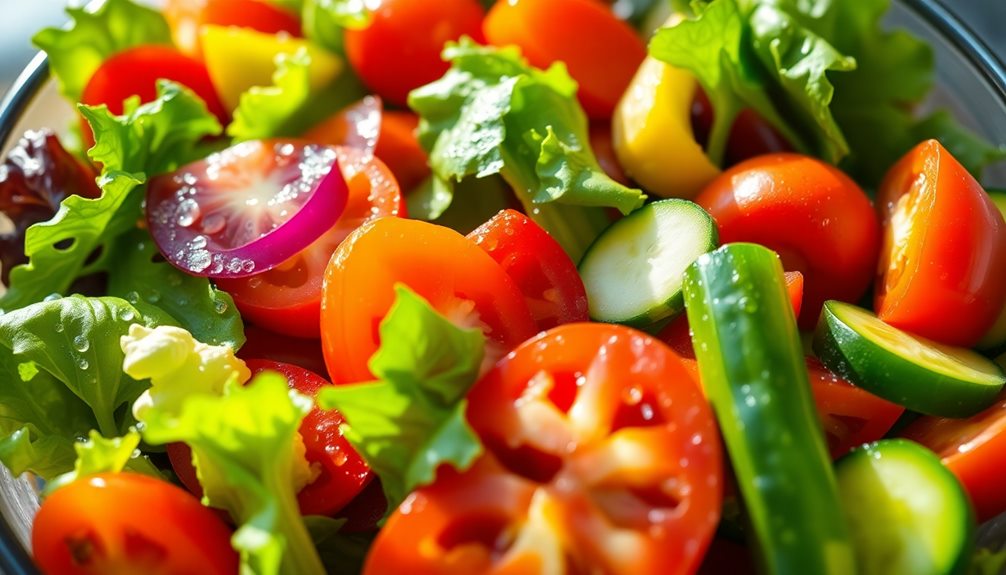
When it comes to crafting the perfect salad, the importance of fresh ingredients can't be overstated. Fresh, crisp lettuce and leafy greens are the foundation of any great salad. When you choose vibrant, high-quality produce, you not only enhance the flavor but also elevate the overall dining experience.
Customers notice the difference when salads are made with ingredients that are at their peak season, and they appreciate the commitment to quality. Engaging with the produce lets you feel the textures and taste the flavors, ensuring you select the freshest options available.
This attention to detail helps your salads stand out from the competition. Using seasonal produce not only supports local agriculture but also promotes sustainability—something today's diners value more than ever.
Effective Washing Techniques
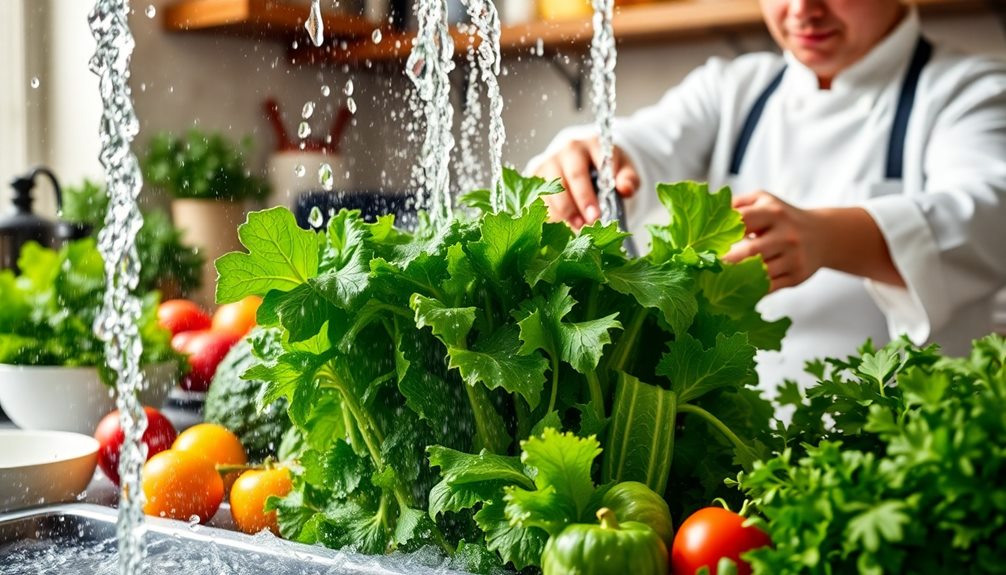
Fresh ingredients set the stage for a delicious salad, but how you wash them is just as important. The process begins with washing the lettuce under cold running water to eliminate dirt and contaminants. This step guarantees that your fresh greens are safe to eat and ready for salad creation.
Here are some effective washing techniques to follow:
- Rinse lettuce leaves thoroughly to remove any residual soil.
- Inspect pre-washed greens for signs of browning or spoilage.
- Use a salad spinner to dry the lettuce efficiently, removing excess moisture.
- Store washed greens in the refrigerator until you're ready to assemble your salad.
Optimal Drying Methods
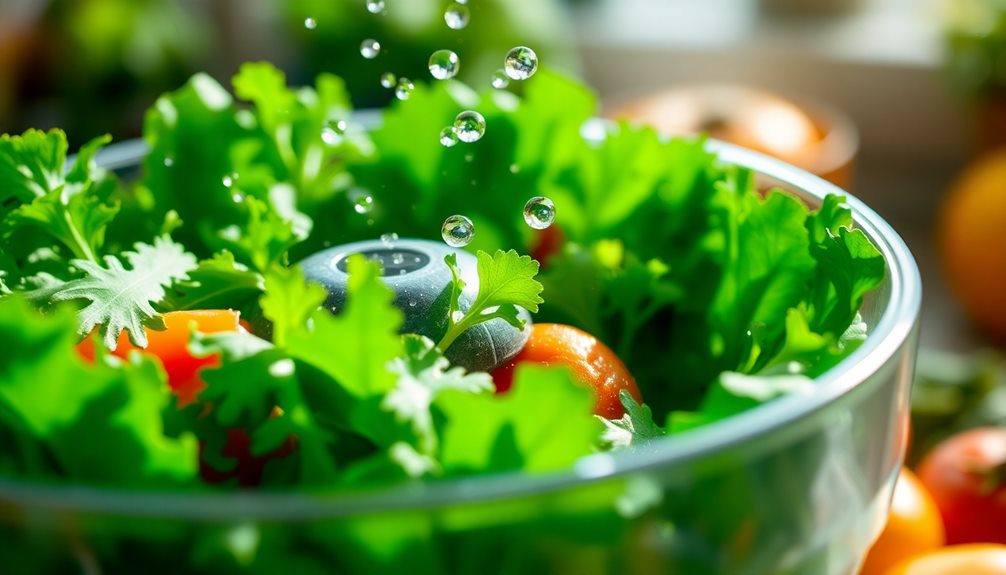
When it comes to keeping your greens crisp, using a salad spinner can make a huge difference by efficiently removing excess water.
You'll also want to guarantee proper airflow by storing your salads in perforated bins instead of airtight containers.
These techniques not only enhance freshness but also help maintain that perfect crunch you love in your salads.
Salad Spinner Efficiency
Maximizing the efficiency of a salad spinner is key to keeping your greens crisp and vibrant. Here are some tips to enhance your spinning technique:
- Spin in small batches for ideal drying
- Rinse greens thoroughly before spinning
- Spin until leaves feel dry to the touch
- Use a two-step process for maximum crispness
Using a salad spinner helps remove excess water from washed greens, preventing sogginess and ensuring they maintain their texture. Overcrowding can hinder moisture removal, so it's best to spin small amounts at a time.
After rinsing, spin the greens until they feel dry. This not only keeps greens crisp but also prolongs freshness during storage.
Additionally, drier leaves adhere better to dressings, enhancing overall salad quality. By following these simple steps, you can enjoy salads that aren't only visually appealing but also deliciously crunchy.
Airflow and Drying Techniques
After spinning your greens to remove excess water, airflow plays an essential role in maintaining their crispness. Restaurants know that proper air circulation is key to keeping your lettuce crisp. They often store greens in perforated bins or containers that promote ventilation, preventing moisture buildup that can lead to wilting.
For ideal storage, place your greens in the crisper drawer of your refrigerator, which should be set to high humidity. This setting helps maintain some moisture without allowing the greens to become soggy.
To further enhance airflow, avoid overcrowding the storage containers; keeping greens separate helps prevent bruising and guarantees they stay fresh.
Using paper towels to line the storage containers can also be beneficial. The towels absorb any excess moisture, further aiding in the preservation of your salad greens.
By combining these techniques—efficient drying, proper airflow, and strategic storage—you can enjoy crisp salads just like the ones served in restaurants.
Storage Solutions for Crispness
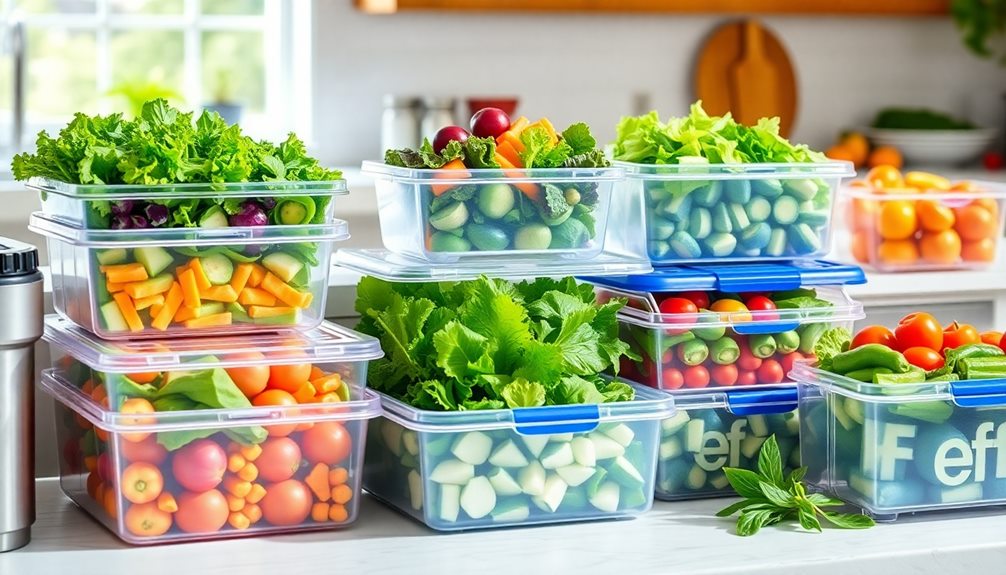
To keep salad greens crisp and fresh, restaurants employ various storage solutions that enhance humidity and airflow. These methods are essential for extending the freshness of lettuce and preventing oxidation, guaranteeing your greens stay vibrant and ready to serve.
- Use perforated bins for improved air circulation
- Store lettuce in the crisper drawer at high humidity
- Incorporate paper towels to absorb excess moisture
- Lightly wrap heads of lettuce in dish towels
By using perforated bins, restaurants promote airflow, which helps maintain crispness. Greens stored in the crisper drawer of refrigerators benefit from high humidity, allowing for peak moisture retention without causing sogginess.
Additionally, placing paper towels inside containers absorbs excess moisture, preventing limpness while still enabling airflow. Some establishments even wrap heads of lettuce in dish towels to prolong freshness and reduce spoilage.
When stored properly, heads of lettuce can last from 1 to 3 weeks, while loose-leaf varieties stay fresh for up to 10 days. By implementing these storage techniques, restaurants guarantee that you always receive fresh and crisp salads that enhance your dining experience.
Assembly for Maximum Freshness
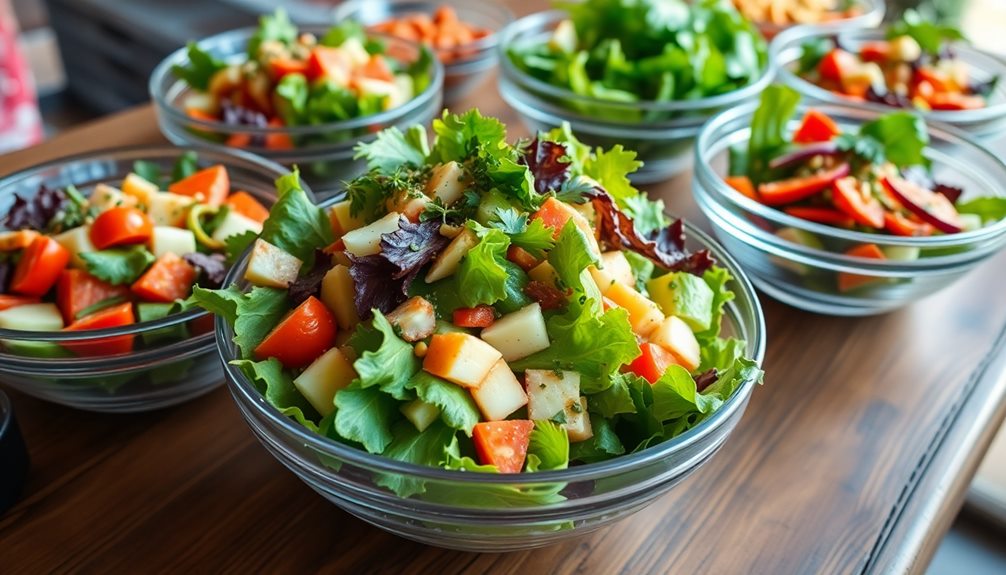
When you're assembling a salad, ingredient temperature control is key to preventing wilting.
Layering techniques not only create a visually appealing dish but also build a sturdy base for your ingredients.
Ingredient Temperature Control
Maintaining ingredient temperature control is vital for keeping salads crisp and fresh. When you prioritize the freshness of your greens, here are some key practices to follow:
- Keep salad components refrigerated until assembly.
- Chill serving dishes before plating.
- Use cold water baths for rinsing greens.
- Store ingredients separately to prevent spoilage.
By ensuring that your fresh lettuce and vegetables are kept cool, you help them stay crisp. Restaurants often prep ingredients in advance, storing them in the fridge to protect against premature wilting or spoilage.
When it's time to assemble your salad, rinsing the greens in cold water can enhance their texture and refresh them, making them even more appealing.
Chilling serving dishes is another important step. By keeping the plates cool, you retain the lower temperature of the ingredients, thereby maintaining that delightful crispness.
Layering Techniques
Layering salad ingredients properly is crucial for achieving maximum freshness and visual appeal. Start with sturdy greens like romaine or kale as your base; these provide a solid foundation that supports lighter ingredients without crushing them.
Using layering techniques, add each ingredient one handful at a time to prevent bruising the delicate lettuce. Incorporating fresh herbs can also enhance the flavor and aroma of your salad, making it more appealing; for instance, consider adding a hint of essential oils for aromatherapy to evoke a rejuvenating scent.
As you build your salad, consider the texture and crispness of the ingredients. Reserve nuts or crunchy toppings for the final layer to enhance visual interest and maintain the freshness of the underlying greens.
When it comes to dressing, distribute it evenly throughout the salad. This guarantees every layer is coated without making the bottom ingredients soggy. You might even chill your serving dishes beforehand; this small step helps maintain the crispness of the salad for longer during serving.
Proper Mixing Methods
How can you guarantee your salad ingredients remain crisp and vibrant? The secret lies in proper mixing methods, allowing you to create a fresh salad that's bursting with flavor.
- Use large mixing bowls for easy tossing.
- Rinse greens in cold water to maintain crunchiness.
- Layer ingredients carefully for appealing presentation.
- Season during mixing for balanced taste.
Start by rinsing your lettuce and veggies in cold water, then dry them thoroughly. This step prevents sogginess and guarantees your dressing adheres well.
When it's time to mix, use a large mixing bowl; this allows for proper tossing without bruising the greens. Layer your ingredients one handful at a time, which not only enhances the visual appeal but also helps maintain their structure.
Remember to season your greens and vegetables as you mix, not just at the end. This way, every bite is flavorful and well-balanced.
Reviving Limp Greens
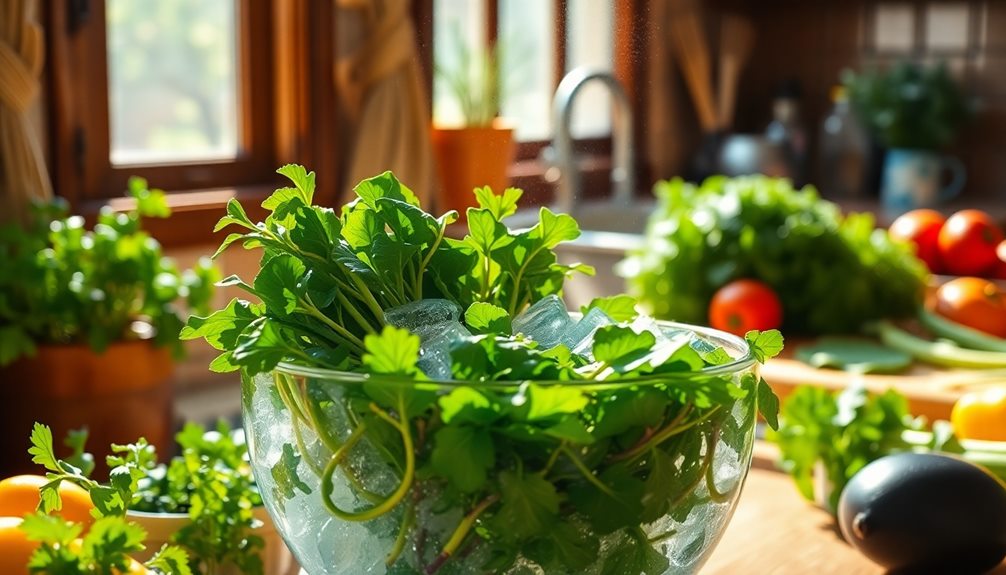
Reviving limp greens is easier than you might think, and with just a bit of effort, you can restore their crispness.
Start by evaluating your leaf lettuce; not all limp greens are beyond saving. If the leaves still have some life, you can bring them back to life with a simple soaking method. Fill a bowl with ice water and submerge the limp lettuce for 20-30 minutes. The cold temperature is vital, as it helps rehydrate the leaves and enhances their crispness.
Once the soaking time is up, remove the revived lettuce from the ice water and dry it thoroughly. Use a salad spinner or a clean towel to get rid of any excess moisture; this step is essential to prevent sogginess.
Your revived greens should be bright, crisp, and ready to use in your favorite salad or dish. Keep in mind that the crispness won't last forever, so it's best to use them quickly for ideal texture and flavor.
With this simple technique, you can enjoy fresh, vibrant salads even when your greens look a bit tired!
Frequently Asked Questions
How Do Restaurants Keep Their Salads so Crisp?
You'll notice that restaurants keep salads crisp by storing greens properly, using perforated bins for airflow, and dressing them just before serving. They also revive limp greens with ice water baths, ensuring freshness and texture.
How to Make Lettuce Crispy Like Restaurant?
To make lettuce crispy like restaurants, soak it in ice water for 20-30 minutes, store it in perforated containers, wash just before use, and dry thoroughly with a salad spinner. Enjoy your fresh, crunchy salad!
What Is the Best Method to Keep Salad Greens Crisp?
To keep salad greens crisp, you should store them in a perforated container, wrap them in a towel to absorb moisture, and refresh wilted leaves with an ice water bath for 20-30 minutes.
What Do Restaurants Spray on Salad to Keep It Fresh?
You might notice restaurants spraying salads with food-grade vegetable washes containing citric or ascorbic acid. These sprays create a protective barrier, reducing oxidation and keeping greens looking vibrant and fresh for longer periods.
Conclusion
To keep salads crisp, you've got to prioritize fresh ingredients, master effective washing techniques, and employ ideal drying methods. You'll want to explore smart storage solutions, assemble your salads thoughtfully, and even learn how to revive limp greens. By following these steps, you can guarantee your salads remain vibrant and crunchy, tantalizing both your taste buds and your guests. Crispness isn't just a goal; it's a commitment to quality, freshness, and flavor in every bite.
Food Service Tips
How Do Restaurants Plate Dishes Beautifully?
Mastering the art of plating transforms ordinary dishes into stunning presentations, but what secrets do chefs use to captivate our senses?
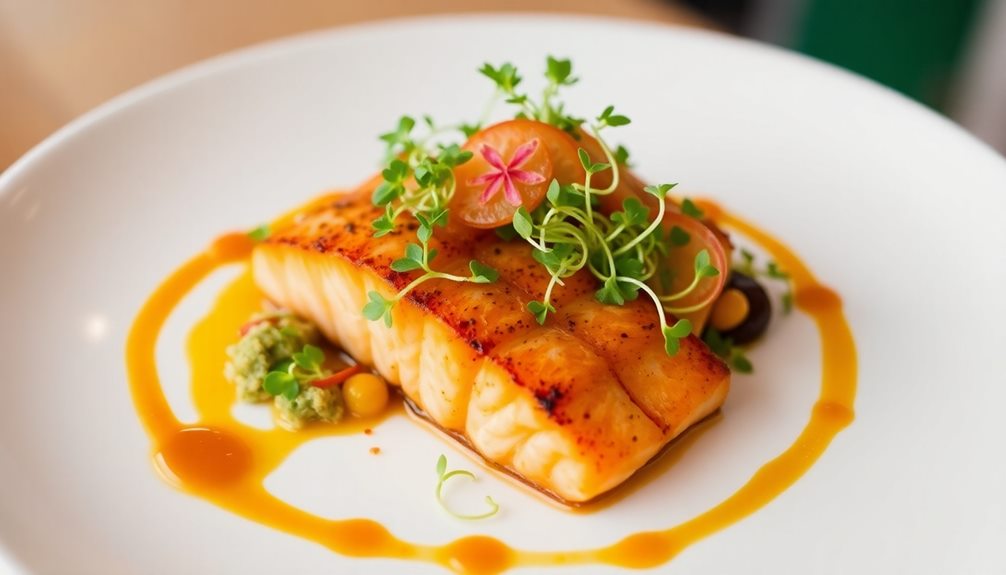
Restaurants plate dishes beautifully by focusing on visual appeal that enhances your dining experience. They choose the right plate size and color, often opting for white to make vibrant foods pop. Techniques like the rule of thirds create balance and draw your eye. Height and layering add dimension, while smart sauce applications and garnishes enhance both aesthetics and flavor. Attention to detail, like cleaning plate edges, completes the look. By mastering these techniques, chefs can transform everyday meals into visual masterpieces. There's so much more to discover about these fascinating methods and tools!
Key Takeaways
- Restaurants enhance visual appeal by using white plates to make vibrant foods stand out and create a polished presentation.
- Applying the rule of thirds helps create balance and visual interest in dish arrangement.
- Layering ingredients adds height and dimension, making presentations more dynamic and engaging.
- Creative sauce application, such as smearing and dotting, enhances visual impact and complements garnishes.
- Attention to detail with plating tools ensures consistency and elevates the overall dining experience.
Importance of Food Plating
Food plating plays an essential role in enhancing your dining experience. When you sit down to enjoy a meal, the presentation can considerably influence your perception of the dish. A meal that's visually appealing often leads you to believe it tastes better, underscoring the importance of aesthetics in culinary arts.
Studies show that beautifully presented meals can elevate your overall experience, making it memorable.
Historically, food presentation has been valued for centuries, establishing itself as an essential art form within the culinary world. Mastering plating techniques allows chefs to express their creativity and differentiate their dishes, which can be critical in a competitive market.
You might notice that a well-plated dish not only looks appetizing but also invites you to savor it more fully.
Moreover, when you share your dining adventures on social media, those eye-catching presentations become essential. Stunning food plating encourages you to take photos and share them, increasing the restaurant's visibility and appeal.
In this way, the art of food plating not only enhances your enjoyment but also contributes to a restaurant's success in today's visually driven culture.
Essential Tips for Eye-catching Plating
Creating an impressive visual presentation for your dishes can elevate your dining experience greatly. To achieve this, start by planning thoroughly with your end goal in mind. Confirm each element of your dish complements both the overall presentation and flavor profile.
Selecting the right plate size and color is vital; white plates often provide the best contrast for vibrant foods, making them pop.
Master various plating techniques over time. For example, use the rule of thirds to balance your dish and create height by stacking or layering ingredients, which engages diners visually.
Don't forget to utilize color, contrast, and texture to create visual interest. Incorporating seasonal and local ingredients not only enhances flavor but also adds freshness to your presentation.
As you plate, revisit and adjust as needed, focusing on simplicity and balance. Highlight your key ingredient by minimizing distractions on the plate.
These essential tips for eye-catching plating will help you create dishes that not only taste incredible but are also a feast for the eyes, making your food presentation as unforgettable as the meal itself.
Techniques for Plate Presentation
Effective plate presentation techniques can transform a simple dish into a stunning visual experience. To start, choose your plate wisely; a white plate often makes vibrant food colors pop.
Utilize the rule of thirds by placing focal points off-center, creating visual interest and balance. Incorporating height is another essential technique; stack or layer ingredients to add dimension and engage diners' eyes.
When it comes to sauces, think of them as an art form. Use plating techniques like smearing, dotting, or swirling to enhance your dish's aesthetic without overwhelming its flavors. These techniques not only beautify the presentation but also complement the overall taste.
Don't forget the importance of negative space. Leaving some areas of the plate empty allows the food to stand out, making it more appealing.
Additionally, employing various plating methods—like classic, free form, or landscape—lets you showcase your creativity and tailor the presentation to align with your restaurant's theme.
Food Arrangement and Visual Techniques
Plating is an art that hinges on thoughtful food arrangement and visual techniques. To create a stunning presentation, consider employing the rule of thirds. This technique encourages you to place focal points off-center, enhancing visual interest and balance on the plate. Visualizing the plate as a clock can help you strategically arrange ingredients, ensuring each component has its designated space.
Avoid overcrowding your plate; a well-defined focal point allows diners to appreciate each element without distraction. When working with moist ingredients, plate them first to prevent run-off. This helps maintain a clean presentation throughout the dining experience. Layering ingredients is another effective plating technique that creates height and engagement, making your dishes more dynamic and appealing.
Here's a handy table that illustrates these techniques:
Technique | Purpose | Benefits |
---|---|---|
Rule of Thirds | Creates balance | Enhances visual interest |
Clock Visualization | Strategic arrangement | Designates space for each component |
Avoid Overcrowding | Maintains focal point | Allows appreciation of elements |
Layering Ingredients | Adds height and dimension | Makes dishes more dynamic |
With these techniques, you'll elevate your plating game!
Sauce Application and Garnishing
When you apply sauces to your dishes, consider using the smeared sauce technique for a striking visual impact.
Pair it with thoughtfully selected edible garnishes, like fresh herbs, to enhance the overall presentation.
These elements not only elevate the aesthetics but also engage your diners' senses.
Smeared Sauce Technique
Although many plating techniques exist, the smeared sauce technique stands out for its ability to transform a simple dish into an artistic masterpiece. By using the back of a spoon or spatula, you can create a bold smear of sauce across the plate, enhancing the visual impact and drawing the diner's eye directly to your culinary creation.
This technique allows for dynamic presentation, enabling you to combine multiple sauces and create a striking contrast of colors and textures that adds depth to your plating styles. When applying the smear, remember to reflect on the rule of thirds, positioning the sauce off-center to create visual interest.
Choosing a sauce that complements the flavors of your dish is vital, as it should provide a vibrant backdrop that enhances the overall aesthetic appeal.
After applying your smear, don't forget to clean the edges of the plate. This step is essential for achieving a polished final presentation, ensuring that the focus remains on the beautifully plated food.
The smeared sauce technique truly elevates your plating game, turning your culinary efforts into an enchanting art form.
Edible Garnish Selection
Enhancing a dish with edible garnishes can elevate both its visual appeal and flavor profile. When choosing edible garnishes, consider fresh herbs, microgreens, and edible flowers that complement your main ingredients. These elements not only enhance flavor but also create a striking contrast that draws the eye.
The application of sauces is an art in itself. Use techniques like light drizzling or creating dots and swirls with a squeeze bottle to add a professional touch. This unifies your dish while maintaining a balanced presentation. Remember, the goal is to accentuate the main components without overwhelming them.
Incorporating contrasting colors in your garnishes and sauces is essential for visual interest. A pop of vibrant color can make your dish more engaging and inviting. Additionally, thoughtful placement of garnishes can introduce texture and height, transforming a flat presentation into a dynamic one.
Ultimately, the key to successful garnishing is balance. Verify your edible garnishes elevate the dish without cluttering the plate, allowing the flavors and aesthetics to shine. By focusing on these elements, you'll create a memorable dining experience for your guests.
Creative Plating Methods and Tools
In the world of culinary arts, creative plating methods and tools play an essential role in transforming a simple dish into a visual masterpiece. You can choose from popular plating methods like classic, free form, or landscape, each offering unique approaches to plating and presentation. These methods allow you to express your culinary vision and style.
To plate food beautifully, you'll want to equip yourself with essential plating tools. Decorating brushes can help you create delicate designs with sauces, while precision tongs allow you to arrange components with accuracy.
Utilizing a pastry bag for piping lets you add intricate details with purees or sauces, enhancing the dish's visual texture. For clean and polished looks, metal spatulas are invaluable for molding and shaping sauces.
Round cutters and melon ballers can create uniform shapes from your ingredients, adding variety and interest to the overall presentation. By mastering these creative plating methods and utilizing the right tools, you'll elevate your dishes from ordinary to extraordinary, making every plate a feast for the eyes.
Frequently Asked Questions
How to Plate Food Beautifully?
To plate food beautifully, focus on balance by using the rule of thirds. Incorporate height, contrasting colors, and textures. Drizzle sauces artistically, and choose the right plate to enhance your dish's appeal.
What Are Two Key Points for Attractive Plating?
Studies show that visually appealing food can increase a diner's enjoyment by 30%. To achieve attractive plating, use contrasting colors and create height on the plate, ensuring your dish captivates and delights the eye.
What Do You Think Is the Key to a Beautifully Plated Dish?
You'll find that a beautifully plated dish combines vibrant colors and varied textures. Layering ingredients creates height, while using the rule of thirds guarantees balance, drawing attention to the dish's most appealing elements.
What Is the Rule of 3 in Plating Food?
You might think odd numbers seem random, but the Rule of 3 in plating creates balance and visual interest. Grouping elements in threes guides the eye, enhancing both appeal and harmony on your plate.
Conclusion
In the world of dining, plating is your canvas, turning each dish into a masterpiece. By embracing the art of presentation, you'll not only tantalize taste buds but also create a feast for the eyes. So, let your creativity flow like a river of sauce, and don't shy away from adding that perfect garnish—it's the cherry on top of your culinary creation. With these tips, you'll transform ordinary meals into extraordinary experiences, leaving diners craving more.
Food Service Tips
How Do Restaurants Prepare Food Quickly?
In restaurants, food preparation is a finely-tuned process that combines efficiency and quality; discover the secrets behind their swift service.
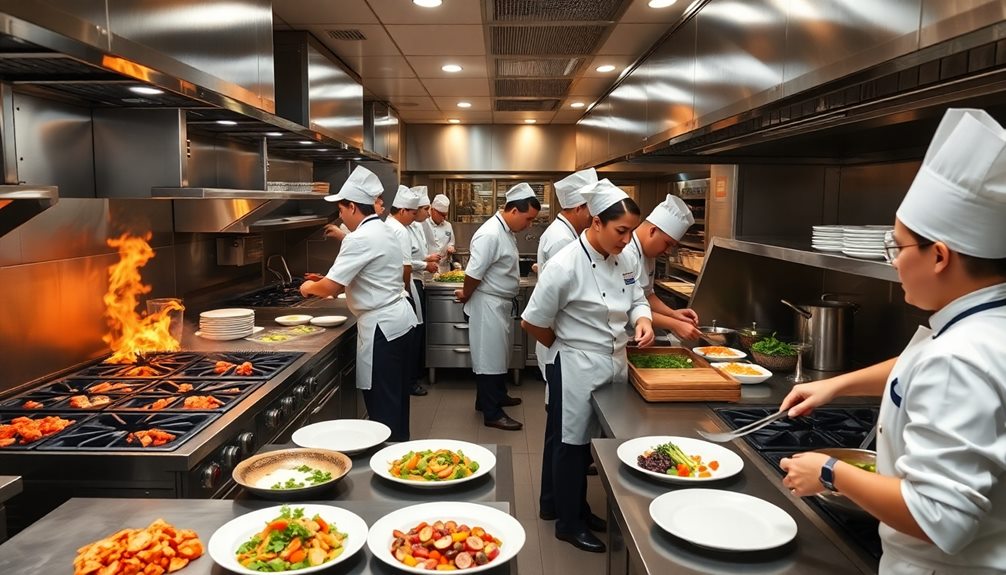
Restaurants prepare food quickly by using techniques like mise en place and batch production, ensuring all ingredients are ready for assembly. They rely on specialized cooking equipment, such as high-efficiency ovens and commercial grills, to speed up cooking times. Staff coordination is key too; designated roles and strong communication help manage multiple orders efficiently. Additionally, pre-cooked meats and frozen ingredients reduce prep time while maintaining quality. By focusing on these strategies, restaurants serve fresh meals swiftly without sacrificing taste. If you're curious about more methods they use, there's plenty more to discover.
Key Takeaways
- Restaurants utilize mise en place to organize ingredients, enabling quick assembly during peak service hours.
- Pre-cooked meats and frozen ingredients reduce cooking times while maintaining flavor and quality.
- Efficient cooking equipment, like high-efficiency ovens and commercial grills, allows for faster preparation of multiple orders.
- Staff coordination through designated roles and strong communication ensures timely and synchronized order preparation.
- Batch production of sauces and standardized recipes help streamline cooking processes and maintain flavor consistency.
Pre-Preparation Techniques
In the bustling world of restaurants, effective pre-preparation techniques are vital for speedy service. You'll often find that successful kitchens rely on the principle of mise en place, which means "everything in its place." This method guarantees all ingredients are organized and ready for quick assembly during peak hours.
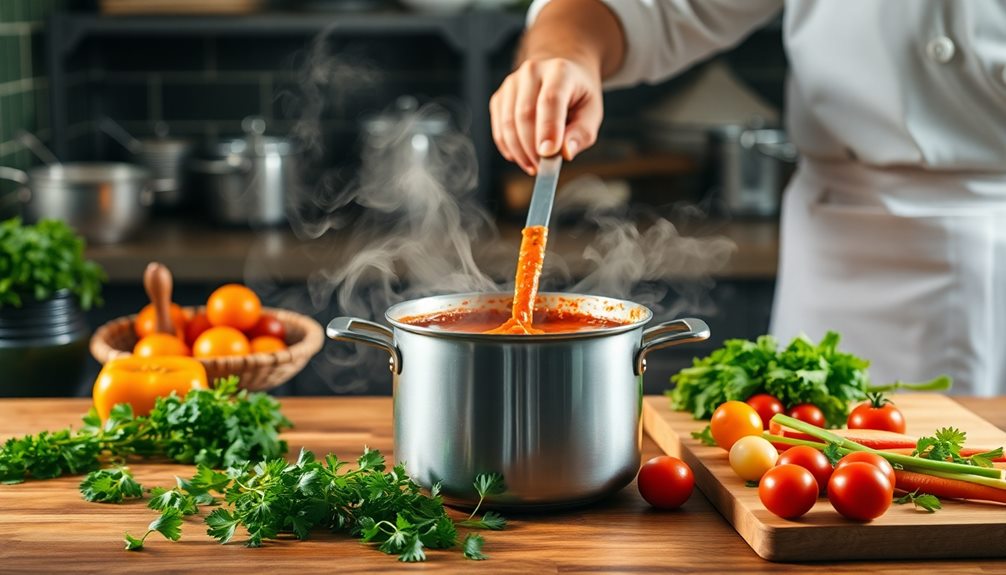
Daily prep work is important, and that often involves making large batches of base sauces and gravies. With these prepared, you can customize dishes rapidly, enhancing your efficiency.
Using pre-cooked meats is another time-saver. By reheating these items, you greatly reduce cooking time while still delivering flavor-packed meals.
Additionally, efficient kitchen organization, including pre-cut vegetables and marinated proteins, streamlines the cooking process even further. You'll notice that batch cooking staple items like sauces and stocks allows you to manage multiple orders simultaneously, securing consistency in quality.
Efficient Cooking Equipment
When it comes to speeding up food preparation, efficient cooking equipment plays an essential role in restaurant kitchens. In fast-paced environments, the right tools can make a significant difference in cooking processes and overall service speed.
Here are three types of efficient cooking equipment that are commonly used:
- High-Efficiency Ovens and Induction Cooktops: These appliances reach high temperatures quickly, allowing chefs to cook food faster than conventional equipment.
- Specialized Tools: Commercial grills and pasta cookers enable the rapid cooking of multiple orders at once, which helps reduce wait times for customers.
- Steam Boxes and Blast Chillers: These tools guarantee even cooking and rapid cooling, enhancing food safety and preparation speed.
Moreover, microwaves are frequently utilized in fast food settings for quick reheating and finishing of partially cooked items. This approach enhances service speed without compromising quality.
The layout of professional kitchens is also strategically designed to facilitate teamwork, making it easier for chefs to use efficient cooking equipment while managing various cooking processes simultaneously.
This combination of tools and layout guarantees that restaurants can serve delicious meals promptly.
Staff Coordination Strategies
Effective staff coordination is essential for a restaurant's success, especially during peak hours. To achieve this, you should assign designated roles, like prep cooks and line cooks, which streamlines operations and guarantees quick assembly of dishes.
Strong communication among your kitchen staff is critical; it allows for synchronized timing and adjustments, enabling multiple orders to be prepared simultaneously.
As an experienced chef, you'll often need to manage several cooking processes at once. By honing your multitasking skills, you can enhance workflow and greatly reduce preparation times.
Integrating food expeditors into your kitchen setup also plays an important role. They help guarantee dishes are cooked in the correct sequence and served promptly, maintaining the overall flow of service.
Lastly, regular training and feedback sessions are key in cultivating teamwork. These practices enhance your staff's ability to adapt quickly to the dynamic demands of a busy kitchen environment.
When everyone works together seamlessly, it not only boosts efficiency but also creates a positive atmosphere that can elevate the dining experience for your customers.
Use of Frozen Ingredients
Using frozen ingredients can greatly enhance your restaurant's efficiency and speed during service. These ingredients help you reduce preparation time, allowing your team to focus on meal assembly and customer service.
Here are three key benefits of using frozen ingredients:
- Time-saving: Frozen produce is often pre-washed, cut, and blanched. This means you can quickly thaw and cook them, considerably cutting down on the time needed for ingredient prep.
- Consistency: Relying on frozen pre-made items like doughs, sauces, and entrees guarantees that each dish maintains the same quality, speeding up meal assembly while adhering to your restaurant's standards.
- Reduced food waste: By using frozen ingredients, you can keep items for longer periods, minimizing spoilage. This helps manage inventory effectively and cuts down on costs associated with food waste.
Moreover, quality control measures are essential when working with frozen ingredients, guaranteeing they meet your restaurant's high standards.
Flavor Development Methods
Flavor development methods play an essential role in how restaurants create delicious dishes efficiently. By preparing base sauces and gravies in large batches, chefs can quickly adjust flavors with various spices and ingredients, tailoring them to different dishes. This not only saves time but also enhances the overall quality of the food.
Pre-marinated proteins and pre-prepped vegetables allow you to boost flavor without lengthy cooking times. Also, letting dishes sit for a short period after preparation helps flavors meld together, enhancing the dining experience. Utilizing standardized recipes guarantees flavor consistency while streamlining the cooking process.
Techniques such as blanching vegetables or using sous-vide cooking can expedite flavor development. Blanching retains color and texture, while sous-vide assures even doneness, elevating the final taste of your dishes.
These methods help you serve flavorful food quickly, making sure that your customers enjoy every bite without delay. Incorporating these flavor development techniques not only makes your kitchen more efficient but also keeps your dishes consistently delicious, allowing you to impress diners with both speed and quality.
Inventory Management Practices
When you manage inventory effectively, you're not just keeping track of ingredients; you're also ensuring that everything stays fresh and ready for use.
By rotating stock efficiently and simplifying your menu, you can minimize waste and streamline operations.
This approach not only saves time but also enhances the overall dining experience for your customers.
Efficient Stock Rotation
Effective stock rotation is essential for restaurants aiming to minimize waste and maintain ingredient freshness. By implementing efficient practices, you can greatly reduce food waste and enhance your inventory management.
Here are three key strategies to take into account:
- First In, First Out (FIFO): Always use the FIFO method to guarantee older stock is utilized before newer items. This approach keeps ingredients fresh and reduces spoilage.
- Labeling System: Implement a clear labeling system with expiration dates. This allows your kitchen staff to quickly identify which items need to be used first, promoting efficiency and preventing waste.
- Regular Inventory Audits: Conduct regular audits to identify slow-moving items. This helps you adjust your purchasing strategies, reducing excess stock and the risk of spoilage.
Utilizing a digital inventory management system can also streamline stock tracking. With real-time updates and alerts for low inventory levels, you can prevent stock-outs and maintain a smooth operation.
Menu Simplification Strategies
Simplifying your restaurant's menu can greatly improve efficiency in food preparation and service. By focusing on high-demand dishes, you streamline ingredient preparation and reduce the complexity of cooking processes. This not only speeds up service but also boosts food quality.
Implementing just-in-time preparation based on expected demand minimizes waste and guarantees your ingredients are fresh and readily available for quick assembly.
Seasonal menu changes are another effective strategy. By leveraging fresh, locally available ingredients, you optimize inventory management and cut down on extensive storage and prep time. A concise list of daily specials reduces preparation complexity, enabling faster service during peak hours while still offering variety to your customers.
Lastly, utilizing efficient storage systems helps keep prepped ingredients organized. When your kitchen staff can quickly access necessary items, it greatly improves the cooking process.
Cooking Techniques for Speed
When you think about how restaurants whip up meals in no time, high-heat cooking methods like grilling and sautéing are key players.
They often rely on pre-cooked ingredients to speed up the process, letting chefs focus on finishing dishes quickly.
Plus, an organized kitchen allows them to juggle multiple cooking techniques at once, ensuring everything's ready to serve at the same time.
High-Heat Cooking Methods
High-heat cooking methods are vital for restaurants aiming to prepare food quickly without sacrificing quality. By utilizing techniques that exceed 400 degrees Fahrenheit, you can considerably reduce cooking times and enhance flavor.
Here are three popular high-heat cooking methods:
- Grilling: This method cooks food directly over a heat source, creating a desirable char and smoky flavor while keeping cooking times minimal.
- Sautéing: In professional kitchens, sautéing allows you to cook ingredients quickly in a small amount of oil, resulting in rapid cooking that preserves the food's texture and taste.
- Wok Cooking: This technique excels in stir-frying, where high heat and constant movement guarantee that ingredients cook rapidly without losing moisture.
Other methods like searing meats and flash frying also play a vital role in high-heat cooking. Searing locks in moisture and flavor, while flash frying can complete cooking in just minutes.
Additionally, high-heat induction cooktops are becoming more common in professional kitchens, as they quickly heat pots and pans, further enhancing efficiency.
Embracing these high-heat techniques can streamline your cooking process and elevate your dishes.
Pre-Cooking Techniques
In the fast-paced environment of a restaurant, pre-cooking techniques can be a game changer for enhancing efficiency. By slow-cooking meats like ribs and steaks in broilers, you can guarantee they're nearly finished when an order comes in, allowing for rapid service.
Additionally, prepping ingredients like vegetables in advance and storing them in bins means you can grab what you need quickly during busy periods. Incorporating various toilet types into your kitchen's design can also streamline the process, assuring a clean and efficient workspace.
Bulk cooking plays an essential role here too. When you prepare pasta in large quantities, you can finish it quickly in sauté pans, maintaining both speed and quality. Pre-cooked items, such as chicken and ribs, can be reheated swiftly, ensuring that dishes hit the table promptly without sacrificing flavor or safety.
Utilizing heavy-duty equipment like high-efficiency ovens and steam boxes greatly reduces cooking and reheating times. These methods not only streamline your workflow but also help in managing high volumes of orders, keeping customers satisfied.
Efficient Kitchen Organization
Efficient kitchen organization is key to maximizing speed and productivity in a restaurant. By implementing strategies like mise en place, you guarantee all ingredients are prepped and within reach, allowing for quick assembly during peak times.
Here are three essential components of efficient kitchen organization:
- Batch Cooking: Prepare staples like sauces and gravies in advance. This reduces the time needed during service, enabling you to assemble orders rapidly.
- High-Heat Cooking Techniques: Utilize specialized equipment such as induction cooktops and commercial ovens. These tools considerably cut down cooking times, making it easier to serve dishes promptly.
- Staff Coordination: Designate roles within your team to streamline workflows. Multitasking allows multiple dishes to be prepared and cooked simultaneously, a vital factor in maintaining a fast-paced environment.
Additionally, tools like food processors and steam boxes can enhance efficiency by speeding up prep time and guaranteeing even reheating of pre-cooked ingredients.
Challenges in Fast Service
Fast service in restaurants often feels like a high-stakes race against time, with kitchen staff scrambling to meet customer demands. Understaffing during peak hours can lead to service delays, creating traffic jams in the kitchen that slow down meal preparation.
You might notice that effective communication among staff is fundamental for preventing these issues. When everyone's on the same page, orders get coordinated promptly, keeping food at the right temperature and preventing it from becoming cold or overcooked.
In a similar vein, understanding grocery store hours can greatly enhance customer convenience and planning. However, the challenge lies in balancing customer expectations for fast service with the need for quality food. You may see kitchens relying on heat lamps and microwaves as temporary solutions to maintain food quality during these hectic moments. While these methods can help, they often don't match the standards of freshly prepared dishes.
Understanding kitchen workflows is essential to improving the overall experience for customers. It's important to recognize that service delays often stem from the dynamics of a busy kitchen rather than inefficiency.
Frequently Asked Questions
How Do Restaurants Prepare Food so Fast?
You'll notice restaurants prepare food fast by organizing ingredients, using efficient cooking techniques, and employing bulk cooking methods. Their well-coordinated staff and pre-made items enhance speed, ensuring your meal arrives quickly and consistently.
How Is Fast Food Prepared?
When you bite into fast food, you're tasting efficiency. Restaurants prepare it by using pre-cooked ingredients, high-efficiency equipment, and standardized processes, ensuring everything's hot and ready to go in a flash. It's all about speed!
How Do Professional Chefs Cook so Fast?
You'll notice professional chefs cook quickly by organizing ingredients beforehand, using high-heat techniques, and managing multiple dishes at once. Their experience, tools, and teamwork allow them to serve meals efficiently during busy times.
What Makes a Restaurant Fast Food?
Fast food restaurants are like lightning in a bottle; they've mastered speed. You'll find pre-cooked ingredients, specialized equipment, and streamlined layouts, all designed to whip up your favorite meals in record time without sacrificing taste.
Conclusion
In the fast-paced world of restaurants, every second counts. By mastering pre-preparation techniques, utilizing efficient cooking equipment, and fostering staff coordination, you create a seamless experience. You embrace frozen ingredients and quick cooking methods, while balancing flavor and speed. Yet, maneuvering challenges in fast service requires resilience and creativity. When you blend these elements together, you don't just serve food; you serve passion, you serve joy, and you serve unforgettable moments that keep customers coming back for more.
Food Service Tips
How Do Restaurants Keep Pasta Al Dente?
You might be surprised to learn the secrets behind restaurants’ perfect al dente pasta; discover the techniques that elevate your home cooking!
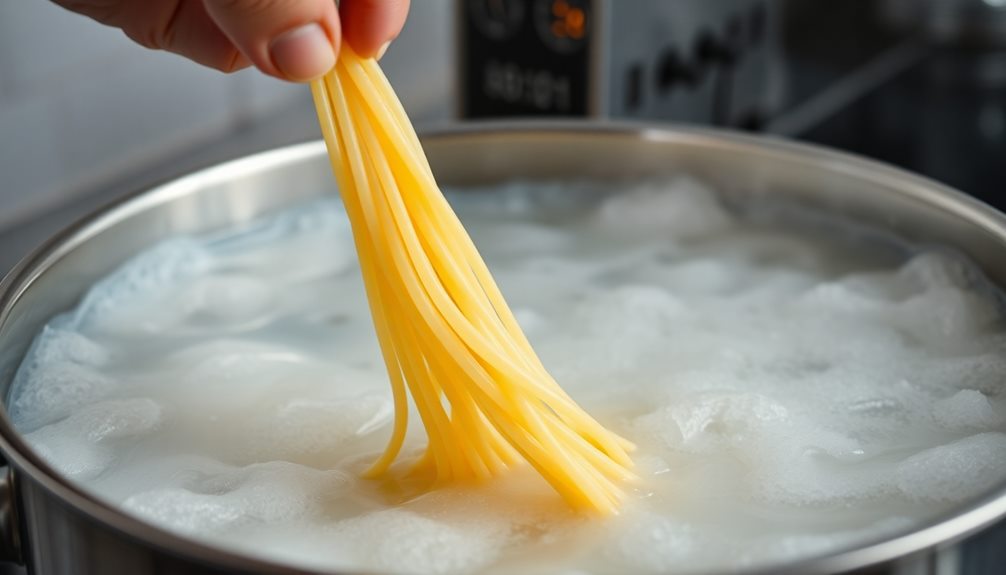
Restaurants keep pasta al dente by carefully timing the cooking process. They cook it for 1-2 minutes less than the package instructions, ensuring it retains its firmness. Rapidly cooling the pasta in an ice bath halts cooking and prevents mushiness. When reheating, they briefly boil or sauté the pasta in sauce, which enhances flavor while restoring its ideal texture. Adding reserved starchy pasta water also helps the sauce cling better, achieving that restaurant-quality finish. If you're curious about more techniques and tips, you'll discover many ways to elevate your pasta cooking skills.
Key Takeaways
- Restaurants cook pasta for 1-2 minutes less than package instructions to achieve the perfect al dente texture.
- They use a rolling boil to prevent sticking and overcooking while maintaining consistent cooking times.
- Pre-cooked pasta is stored in oiled trays and chilled rapidly to retain its firmness before serving.
- Reheating techniques, like boiling briefly or sautéing in sauce, restore al dente texture and enhance flavor absorption.
- Reserved starchy pasta water is crucial for emulsifying sauces and ensuring they cling to the noodles effectively.
Importance of Cooking Time
Cooking time is vital when it comes to achieving that perfect al dente pasta. If you've ever enjoyed a dish at a restaurant, you might've noticed how the pasta has a firm, textured bite. That's no accident! Chefs typically cook pasta for 1-2 minutes less than the package instructions recommend. For regular dried pasta, this means cooking it for about 8-10 minutes, while fresh pasta cooks much quicker, usually in about 2 minutes.
Timing's essential; you can't just walk away while the pasta's boiling away. Instead, you'll need to monitor it closely and taste it to guarantee it reaches that desired al dente stage before draining.
Maintaining a consistent boiling temperature is key, too. If the water cools down, the pasta can become mushy, ruining that perfect bite.
Some restaurants even use a double cooking technique. They pre-cook the pasta to just shy of al dente, allowing for a quick finish in the sauce when an order comes in.
Techniques for Pre-Cooking Pasta
To achieve that perfect al dente texture, many restaurants employ a technique called pre-cooking. This method involves boiling the pasta just under al dente, typically 1-2 minutes less than the package instructions. By doing this, chefs guarantee it can finish cooking once combined with sauce, enhancing flavor and texture.
After boiling the pasta, it's vital to cool it rapidly in an ice bath. This halts the cooking process and prevents bacterial growth, keeping the pasta safe and maintaining its ideal texture.
To prevent sticking during storage, restaurants often take these steps:
- Spread pre-cooked pasta on oiled baking trays
- Chill the trays to cool the pasta quickly
- Store the pasta in airtight containers
- Use a little oil to coat the pasta before storage
When it's time to serve, the pre-cooked pasta is briefly immersed in boiling water or heated in a sauté pan with sauce. This finishing touch brings the pasta to al dente perfection and guarantees it's ready to enjoy quickly as possible.
This technique allows restaurants to serve delicious pasta without sacrificing quality or texture.
Reheating Methods for Al Dente
When it comes to reheating pre-cooked pasta, using the right methods guarantees you maintain that coveted al dente texture. Here are some effective techniques to take into account:
Method | Time | Benefits |
---|---|---|
Boiling | 30 seconds | Quick restoration of texture |
Sautéing in Sauce | 2-3 minutes | Flavor absorption, gentle reheating |
Adding Starchy Water | As needed | Enhances sauce adherence |
For boiling, simply immerse your chilled pasta in boiling water for about 30 seconds. This quick method revives its firmness without overcooking. Alternatively, sautéing the pasta in a heated sauce is another fantastic approach; it not only warms the noodles but allows them to soak up flavors, creating a tasty dish.
Don't forget about starchy pasta water! Adding a splash during reheating can greatly improve sauce adherence, making your meal even better. Remember, timing and temperature control are vital in this process. Keep a close eye on your pasta to achieve that ideal al dente texture. With these methods, you'll enjoy perfectly reheated pasta every time.
Flavor Integration With Sauces
When you cook pasta, achieving harmony with the sauce is key to enhancing flavor.
By using starchy pasta water, you can emulsify the sauce, allowing it to cling to the noodles and elevate the dish.
This technique not only improves the taste but also helps maintain that perfect al dente texture you crave.
Sauce and Pasta Harmony
Achieving the perfect harmony between sauce and pasta is essential for creating a delicious dish. This balance elevates your culinary experience, making each bite a delight.
When you finish cooking your pasta in the sauce, you allow the noodles to absorb the flavors while keeping them firm and al dente. Here's how to create that harmony:
- Cook pasta until it's just shy of al dente.
- Sauté the pasta with the sauce over low heat.
- Add reserved cooking water to adjust the sauce's consistency.
- Make certain the sauce clings beautifully to each noodle.
Emulsifying With Pasta Water
Emulsifying with pasta water is a game-changer for creating sauces that cling perfectly to your noodles. This starchy cooking water is essential for enhancing flavor and ensuring your sauce has the right consistency.
Before you drain your pasta, make sure to reserve a cup of that rich liquid. Adding a splash of pasta water to your sauce not only creates a creamy texture but also helps it coat the pasta evenly.
The starch in the pasta water acts as a binding agent, thickening the sauce and making it more cohesive.
When you combine the pasta and sauce over low heat, gradually incorporating the reserved water, it allows your noodles to absorb those delicious flavors while maintaining that al dente texture you love.
Storage Tips for Cooked Pasta
To keep your cooked pasta at its best, store it in an airtight container within two hours of cooking. This helps maintain moisture and prevents bacterial growth.
Once stored properly, refrigerated cooked pasta can last for 3-5 days. To enhance your storage experience, consider these tips:
- Lightly coat the pasta with olive oil to prevent sticking.
- Chill cooked pasta immediately in an ice bath to maintain its al dente texture.
- For longer storage, vacuum seal your cooked pasta to extend its shelf life.
- When reheating, add a splash of reserved pasta cooking water to restore moisture.
Common Mistakes to Avoid
When cooking pasta, it's easy to make a few common mistakes that can ruin your dish.
Overcooking it leads to a mushy texture, while neglecting to salt the water results in bland flavors.
Don't forget to reserve some starchy pasta water; it's essential for making your sauce stick and enhancing the overall taste.
Overcooking Pasta Issues
Achieving the perfect pasta texture requires vigilance, as overcooking can quickly turn a delightful dish into a mushy disappointment. To avoid this, keep these common mistakes in mind:
- Not timing the cooking process properly; pasta continues to cook after you drain it.
- Failing to maintain a rolling boil, which can cause noodles to stick and overcook.
- Forgetting to stir during the initial cooking phase, leading to clumping and uneven cooking.
- Neglecting to reserve some starchy cooking water, essential for sauce adherence.
To guarantee your pasta is perfectly al dente, pull it from the boiling water a minute or two early. Remember, it'll keep cooking even after you drain it!
A consistent boil helps maintain even cooking, while stirring prevents clumping. If you reserve a bit of the cooking water, you can achieve a more cohesive sauce that clings to your pasta beautifully.
Neglecting Salt Importance
Many home cooks overlook the importance of seasoning pasta cooking water, which can lead to bland noodles and a lackluster overall dish. Salted water is a game changer in the cooking process. When you add about ¾ teaspoon of salt per quart of water, it allows the flavor to penetrate the pasta effectively, enhancing its taste.
Unsalted pasta won't hold its own when paired with sauces, often resulting in a dull dish where the flavors clash rather than complement.
Moreover, salting the water plays an essential role in achieving that perfect al dente texture. The salt helps promote even cooking, ensuring every bite is just right. Restaurants understand this principle and prioritize salting their water to maintain the quality and taste of their pasta.
If you skip this important step, you're likely to end up with bland pasta that doesn't do justice to your sauce.
Next time you boil pasta, remember that a simple act of salting the water can elevate your dish tremendously. Don't let your efforts go to waste with underseasoned noodles—embrace the importance of salt!
Skipping Pasta Water Usage
One of the biggest mistakes home cooks make is skipping the use of reserved pasta water. This starchy liquid is vital for transforming your dish from bland to brilliant. When you're cooking the pasta, don't forget to save some of that water! Here's why it matters:
- Flavor Infusion: The starch in pasta water enhances the sauce, allowing it to cling better to the noodles. Additionally, using ingredients rich in nutrients, like celery juice, can further elevate the overall health benefits of your dish.
- Moisture Addition: It adds necessary moisture, preventing your dish from becoming dry.
- Consistency Control: You can adjust the sauce's thickness, ensuring it perfectly coats each strand.
- Binding Agent: It acts as a binding agent, helping to keep the pasta and sauce cohesive.
If you neglect to use pasta water, you risk a dry and uninviting dish. The flavor derived from cooking the pasta is fundamental for achieving restaurant-quality results.
Frequently Asked Questions
How Do Italian Restaurants Keep Pasta Warm?
Italian restaurants keep pasta warm by using a Bain Marie, where they monitor the temperature closely. They often drizzle olive oil or butter to prevent sticking, ensuring the pasta remains moist and ready for serving.
How Do You Store Pasta Al Dente?
Did you know cooked pasta can last up to 48 hours in the fridge? To store it al dente, drain it, drizzle with olive oil, and place it in an airtight container to keep it fresh.
How Do You Pre Cook Pasta for a Restaurant?
To pre-cook pasta for a restaurant, you boil it until it's just under al dente, chill it in an ice bath, then store it on oiled trays. This keeps it ready for quick service.
How Should Pasta Be Cooked for a La Carte Service?
For a la carte service, you should pre-cook pasta just shy of al dente, chill it, and then quickly reheat in boiling water or toss it in a hot sauce to enhance flavor and texture.
Conclusion
In the world of pasta, achieving that perfect al dente texture is like tuning a fine instrument—too much time, and you've got a soggy mess. By mastering cooking times and reheating methods, you can serve pasta that sings with flavor and firmness. Just like a chef who knows their craft, you'll create dishes that leave guests savoring every bite. So, keep these tips in mind, and let your pasta dance on the plate, perfectly al dente every time!
-
Restaurants4 months ago
How Many Restaurants in New York City
-
Restaurant Operations1 month ago
How Do Restaurants Create Schedules for Staff?
-
Restaurant Operations1 month ago
How Do Restaurants Train New Staff?
-
Best Restaurants4 months ago
Best Restaurant Phoenix
-
Best Restaurants4 months ago
Best Restaurant New Orleans
-
Coffee5 months ago
Ryze Organic: Revolutionizing Coffee with Mushrooms
-
Best Restaurants4 months ago
Best Restaurant Week Deals
-
Restaurant Management4 weeks ago
How to Create a Restaurant Marketing Plan